How to design rectangular tiling areas
-
The steps to draw a rectangular area are as follows:
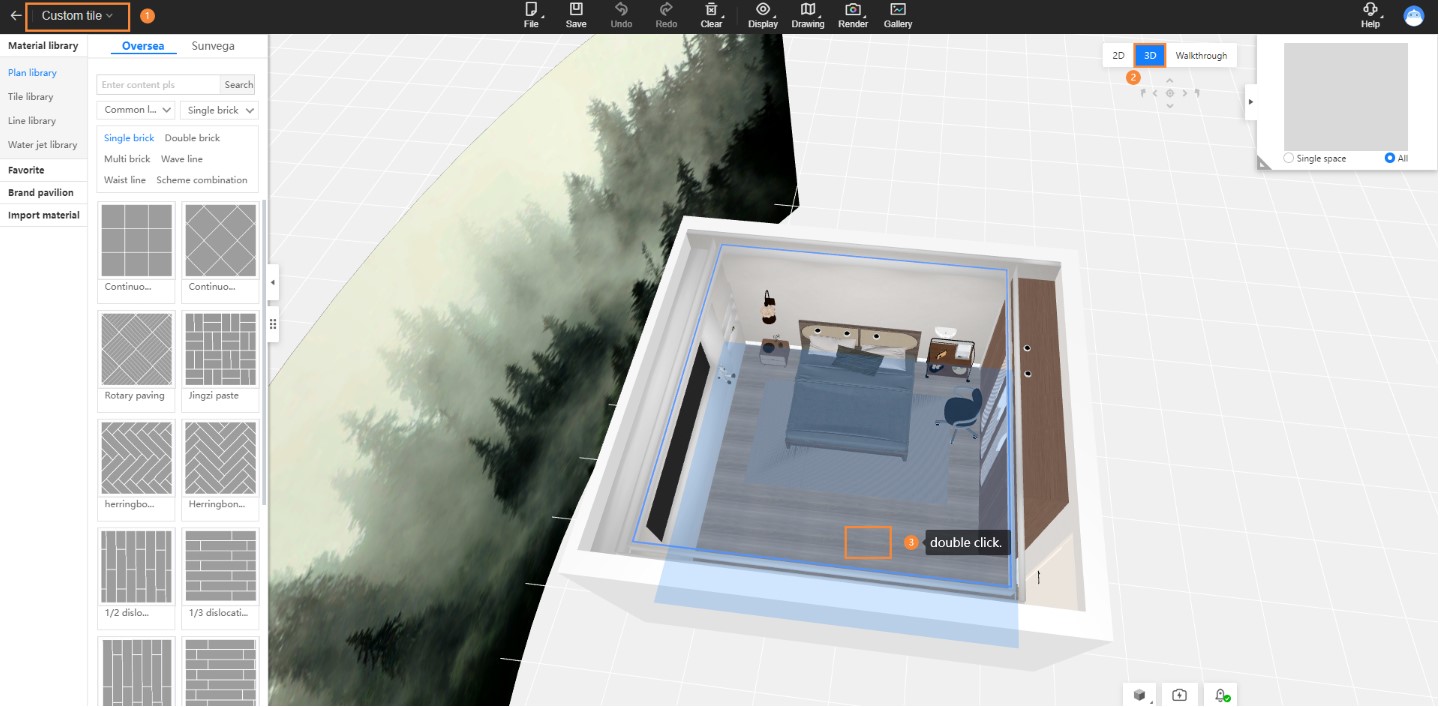
In the 3D/Wandering interface of the Custom Tiling module, right-click on the floor – select Add Tiling (Note: Double left-clicking can also enter the editing area);
-
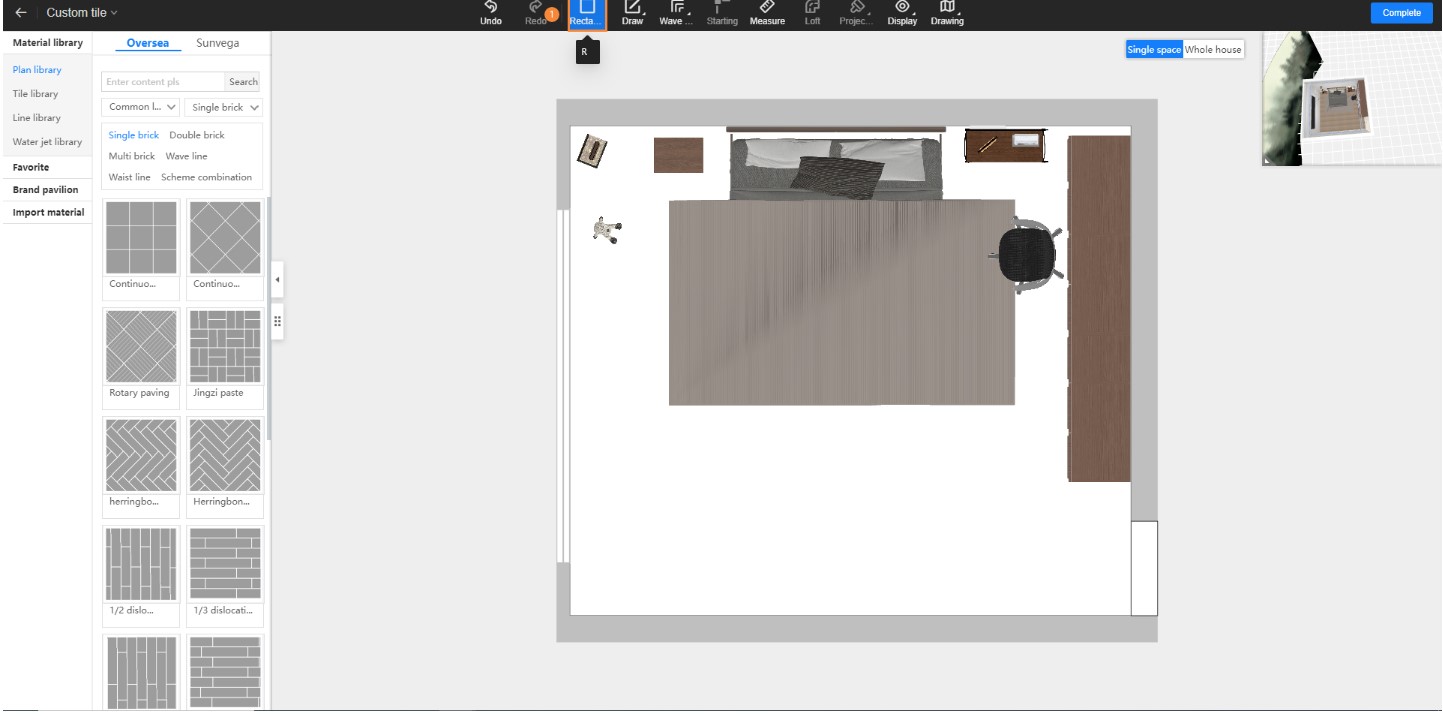
Enter the editing area – move the cursor to Draw Area at the top – click on Rectangle (Note: Directly select standard tiles, draw according to the tile positions, and set the starting point for drawing the rectangle);
-
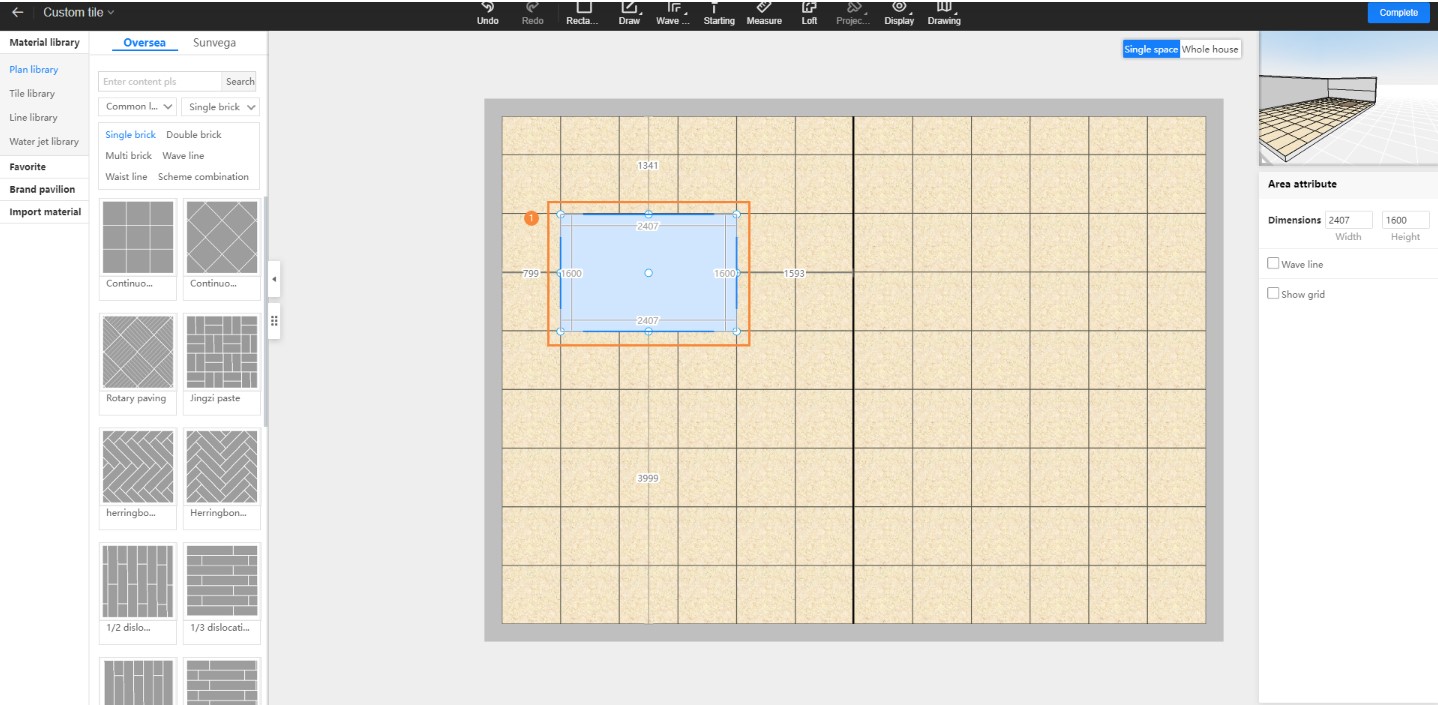
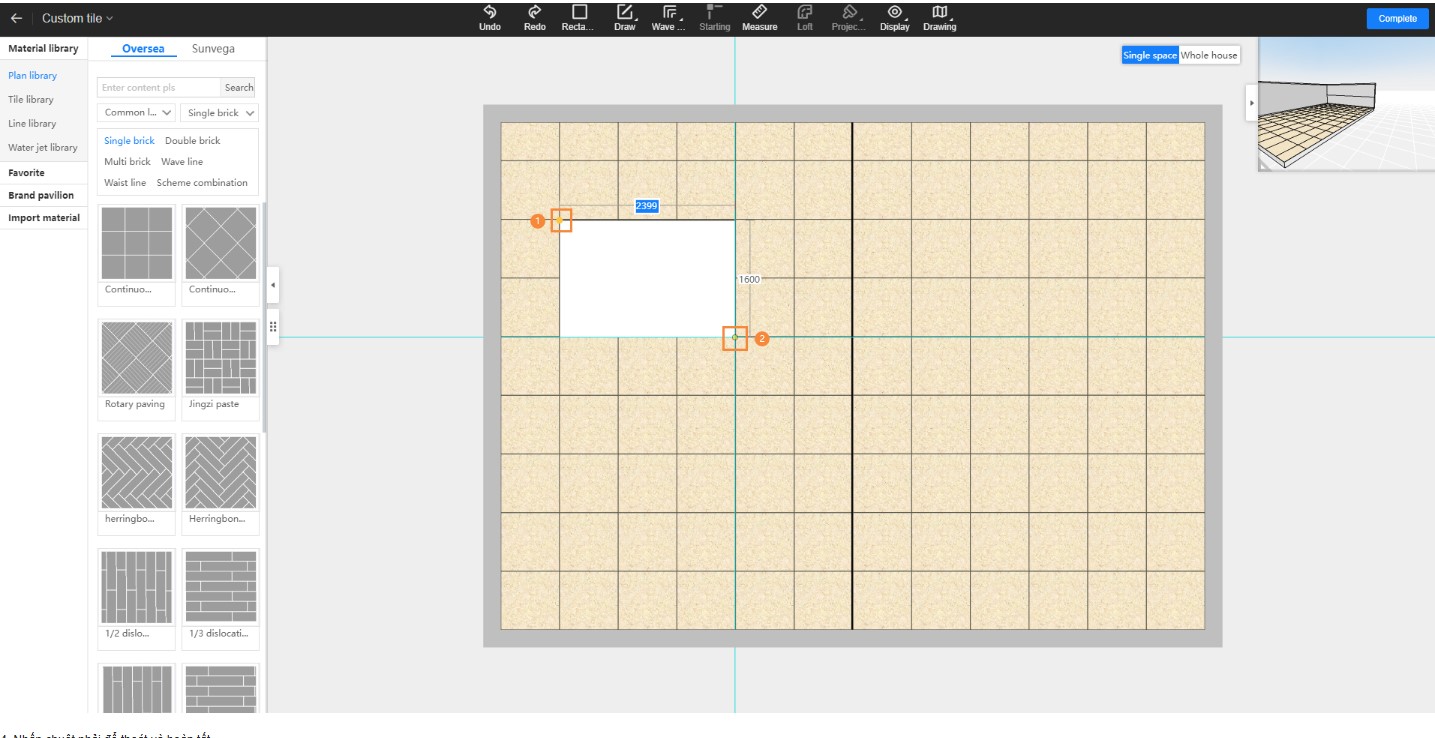
Click on the Starting Point with the mouse – then click on the End Point (Note: You can also directly input the dimensions using the computer keyboard);
-
Right-click to exit and complete the process.